Choosing diamond tooling before you understand the concrete can create problems almost immediately. A tool that works perfectly on one slab may glaze, cut slowly, or wear out far too quickly on another, even when the machine and operator are the same. Concrete hardness is one of the main reasons for that difference, which is why testing the floor before grinding is such an important part of professional surface preparation.
The purpose of a concrete hardness test is not to give you a laboratory-grade structural result. For grinding and polishing, you are trying to understand how the surface is likely to behave against the diamond bond. That information helps you choose a more suitable starting tool, avoid unnecessary trial and error, and create a more predictable grinding sequence.
Why Concrete Hardness Matters Before Grinding
Diamond tools rely on a balance between the diamonds that do the cutting and the bond that holds those diamonds in place. As the tool works, the bond needs to wear at the right rate so that fresh diamond particles remain exposed. If that balance is wrong, the tool can stop cutting efficiently even though there is still plenty of diamond material left in the segment.
On hard concrete, the surface is usually less abrasive against the metal bond. If the bond is too hard, it may not wear quickly enough to expose fresh diamonds, so the tool can begin to glaze and the grinding rate can fall sharply. On softer or more abrasive concrete, the opposite problem can happen: the bond may wear too quickly and the tool life can become unnecessarily short.
This is why concrete hardness should be considered before selecting a metal bond. AK Surface Solutions explains the wider relationship between hardness, bond, grit and tooling progression in its Lavina diamond tooling guide.
What Does Concrete Hardness Mean in Floor Grinding?
When contractors talk about concrete hardness during floor grinding, they are usually referring to the hardness of the surface that the diamond tool is actually cutting. This is not exactly the same thing as compressive strength. A strong concrete mix may often produce a hard floor, but the top few millimetres can behave differently because of finishing methods, curing, surface laitance, contamination or previous mechanical preparation.
A heavily power-trowelled slab, for example, may have a dense burnished surface that behaves harder under the grinder than the concrete beneath it. A rain-damaged, weak or highly abrasive surface can behave much softer. For tooling selection, the condition of the working surface is therefore often more useful than relying only on the original mix specification.
The practical question is simple: how much resistance does the surface offer when scratched, and how abrasive is it likely to be against the diamond bond? A Mohs scratch test gives contractors a quick field method for answering the first part of that question.
The Mohs Scratch Test Is the Most Practical Field Method
The Mohs scale ranks mineral hardness from 1 to 10. In floor preparation, a set of hardness picks can be used to scratch the concrete and estimate where the surface sits on that scale. Concrete commonly falls somewhere in the middle of the Mohs range, but there is no single hardness value that applies to every slab.
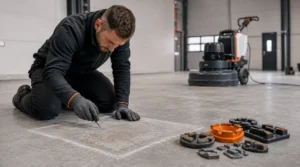
The test works by comparing the floor against picks of known hardness. You begin with a lower-numbered pick and work upward until you find the point at which the pick consistently scratches the concrete. The result gives you an approximate surface hardness that can then be used alongside the floor condition, machine weight and grinding objective when selecting tooling.
For professional grinding, the test is more useful when it is repeated in several representative areas rather than relying on one scratch in one corner. Large floors can contain different pours, repaired areas, variable finishing and changes in density, so a single reading can give a false sense of certainty.
Remove Surface Laitance Before Testing the Concrete
One of the most important details is where you carry out the test. A scratch result taken only from the very top skin of the slab may not represent the concrete that the diamonds will be working on once grinding begins. Surface laitance, curing residue, a tightly burnished finish or light contamination can all affect the reading.
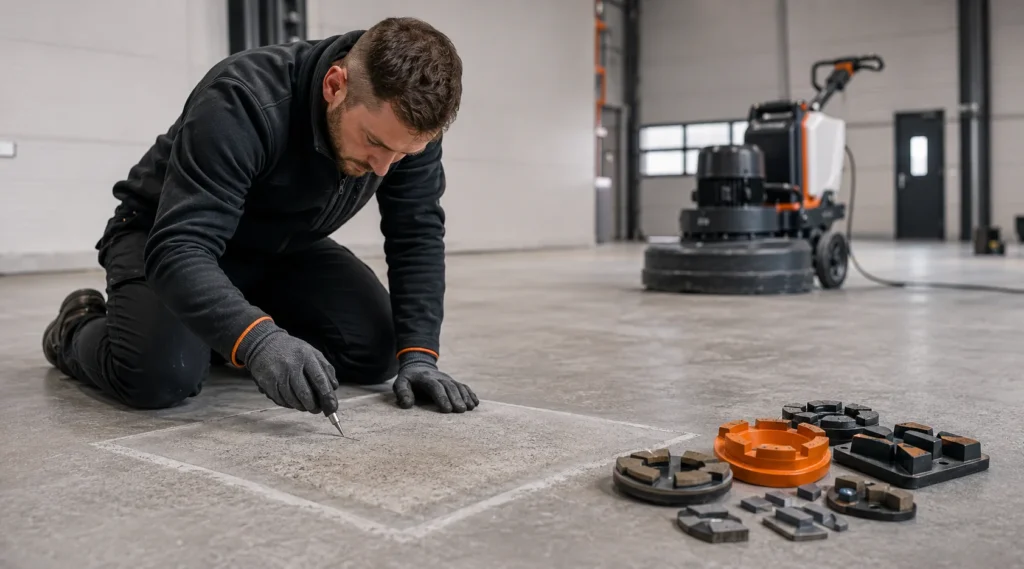
AK Surface Solutions recommends removing the top layer with a hand grinder before carrying out the Mohs test when you want a more representative assessment of the concrete beneath. This small test area exposes the actual material that the metal-bond diamonds are likely to encounter after the initial surface is opened. The same recommendation appears on AK’s medium-concrete metal bond product guidance.
You do not need to grind a large patch. The aim is simply to expose a clean, representative section without changing the slab so aggressively that the test area no longer reflects the surrounding floor. Once that area is exposed, clean away loose dust before using the hardness picks.
How to Carry Out a Mohs Hardness Test on Concrete
Choose a representative section of the floor and make sure the test surface is clean enough for you to see a genuine scratch. If the slab has a coating, curing compound or obvious surface residue, testing through that layer will not tell you much about the concrete itself. On a polished or tightly finished slab, prepare a small area first so you are testing the concrete rather than only the finish.
Start with a lower hardness pick and draw a short, controlled scratch across the surface using firm, consistent pressure. Move upward through the picks until you reach the point where the pick begins to mark the concrete clearly and repeatedly. Do not rely on one accidental mark; repeat the scratch nearby and compare the behaviour before deciding on the approximate hardness.
It is also useful to work from both directions if the result is not obvious. If one pick scratches easily and the next one barely marks the surface, the practical hardness is likely to sit around that transition point. The objective is not false precision. You need a dependable working range that helps you make a better tooling choice.
Test More Than One Area of the Floor
Concrete is not always uniform across an entire project. Floors may include more than one pour, different curing conditions, patch repairs, edges that were finished differently from the main field or sections that have been exposed to different levels of wear. A hardness reading from one spot can therefore be misleading on a large or visibly inconsistent slab.
For a commercial floor, test several areas that represent the main conditions you expect to grind. Include the central field, an edge or perimeter area if it looks different, and any section where the colour, texture or finishing appears to change. If the readings vary, plan the job around the harder and softer zones rather than forcing one tooling choice across the entire floor.
A small grinding test should follow the scratch test whenever possible. Hardness picks tell you how the surface resists scratching, while an actual test grind shows how the chosen tool behaves under the weight and speed of your machine. The two checks together give you a much better starting point.
How Concrete Hardness Affects Diamond Bond Selection
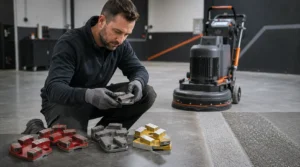
The general rule is the opposite of what many first-time users expect. Hard concrete normally needs a softer metal bond so the matrix can wear and expose fresh diamonds. Soft or abrasive concrete normally needs a harder bond so the segment does not wear away too quickly. Medium concrete sits between those two conditions and is generally matched with a medium bond.
That rule is useful, but it should not be treated as the only factor in tooling selection. Grit, segment design, single- or double-segment configuration, machine weight, grinding speed, wet or dry processing and the amount of material you want to remove all influence performance. The complete range of Lavina diamond tools gives contractors different options for these stages and concrete conditions.
AK’s Grey Lavina metal-bond tools, for example, are intended for medium-hard concrete around Mohs 3–5. Harder floors may need a softer bond, while very hard slabs may require tooling designed specifically to stay open and cutting on dense concrete. The correct choice should always be confirmed by what the tool actually does on the test area rather than by the label alone.
What the Grinding Test Tells You That a Scratch Test Cannot
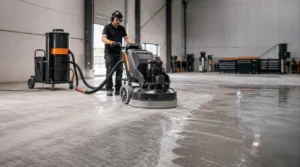
A Mohs reading gives you a useful starting point, but the grinder provides the final confirmation. Once the proposed tooling is fitted, grind a small area and watch both the floor and the segment. A suitable tool should cut consistently, produce a clear scratch pattern and continue working without rapidly losing performance.
If the tool skates over the floor, stops cutting or develops a smooth glazed appearance, the bond may be too hard for the surface. If the segment disappears unusually quickly, the concrete may be more abrasive than expected or the bond may be too soft. Dust characteristics can also provide clues: very fine powder is often associated with harder surfaces, while coarser, sandier dust can indicate a more abrasive slab.
Do not judge the tool after only a few seconds unless the mismatch is obvious. Give the segment enough time to begin working, then inspect the cutting rate, scratch pattern and wear. This simple test can prevent a full floor being processed with the wrong bond.
Concrete Hardness Is Only One Part of the Floor Assessment
Hardness testing should sit inside a broader inspection of the floor. Before committing to a full grinding or polishing system, check for coatings, contamination, cracks, repairs, flatness, curing compounds and the amount of aggregate exposure required. AK’s concrete protection guide also recommends inspecting and testing the slab before confirming the full system.
The required finish matters as well. A coating-removal project may need aggressive tooling and a very different starting grit from a light salt-and-pepper polish. Two floors with similar hardness can therefore use different tools because the objective, machine and surface condition are different.
Think of the hardness test as one of the first filters in the decision. It helps narrow down the bond family, but the test grind tells you whether the whole setup is working together correctly.
Common Mistakes When Testing Concrete Hardness
A common mistake is testing only the untouched top skin of the slab and assuming that result represents the concrete below. Another is taking one reading and applying it to a large floor without checking for changes. Both can lead to a bond choice that seems correct on paper but performs badly once grinding begins.
It is also easy to confuse compressive strength with grinding hardness. Strength data is useful background information, but a grinder interacts with the surface condition, not the concrete cube used in a structural test. Surface finishing and abrasion can change how the floor behaves even when the underlying concrete mix is strong.
Finally, do not use the Mohs number as a substitute for a practical test grind. The best workflow is to inspect the slab, prepare a clean test area, check hardness, choose a likely bond and then confirm that choice under the actual machine.
Frequently Asked Questions
What is the Mohs hardness of concrete?
There is no single Mohs hardness for all concrete. Concrete commonly falls within the middle of the Mohs scale, and industry guidance often places typical slabs roughly between 4 and 8. The actual surface can be softer or harder depending on the mix, aggregate, finishing, curing and condition, which is why the floor should be tested rather than assumed.
How do you test concrete hardness?
For floor grinding, one of the most practical field methods is a Mohs scratch test using hardness picks. Test a clean, representative area and move through picks of increasing hardness until you identify the point where the concrete is consistently scratched. For a more useful tooling assessment, repeat the test in several areas and confirm the result with a small grinding test.
How do you know if concrete is hard or soft?
A Mohs scratch test gives you an approximate hardness range, while the way the floor behaves during grinding gives further clues. Hard concrete often produces fine powder and can cause unsuitable hard-bond tools to glaze, while softer or more abrasive concrete may produce coarser dust and wear segments faster. Surface condition matters, so test the slab rather than judging it only by age or compressive strength.
What diamond bond should I use for hard concrete?
Hard concrete generally requires a softer metal bond. The softer bond wears at a controlled rate and exposes fresh diamond particles so the tool can continue cutting. This is a general rule rather than a complete tooling specification, because grit, segment design, machine weight and the grinding objective also affect the correct choice.
Should you remove surface laitance before a Mohs test?
If the top skin is weak, contaminated, burnished or otherwise unrepresentative, removing a small amount of surface material can give a more useful reading of the concrete underneath. AK Surface Solutions specifically recommends exposing the concrete with a hand grinder before hardness testing when greater accuracy is needed for metal-bond selection.
Test First, Then Choose the Tool
Concrete hardness testing takes only a small amount of time compared with the hours that can be lost using the wrong diamond bond. A simple Mohs test helps you estimate the surface hardness, while a small grinding test confirms how the chosen tool behaves under real working conditions. Together, they give you a stronger basis for choosing the first grinding stage.
If you already know the approximate hardness of the slab, you can compare suitable metal-bond options in AK Surface Solutions’ Lavina diamond tool range or speak to the team with details of the floor, machine and required finish.