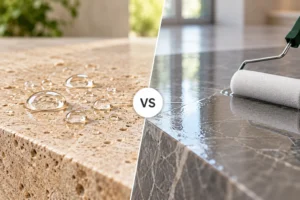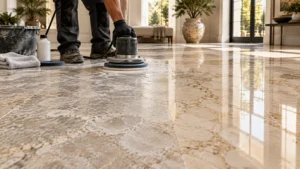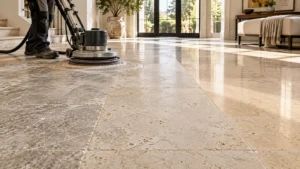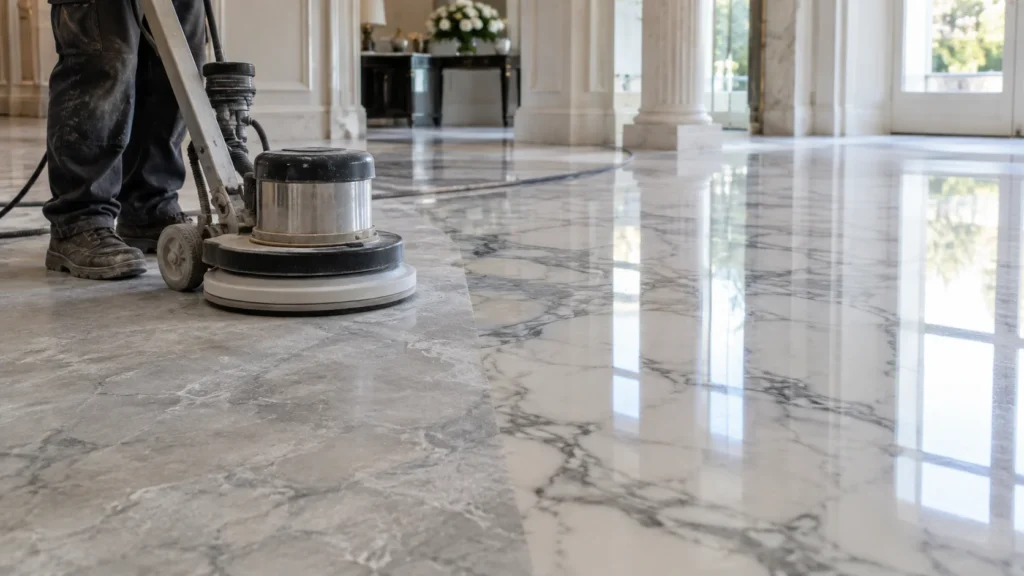
Yes, marble can sometimes be polished without honing it first, but only when the surface is already in good condition and the problem is mainly a loss of gloss rather than physical damage. If the marble has scratches, etch marks, uneven wear, dull traffic lanes or differences in surface level, polishing alone is unlikely to produce a consistent professional finish.
This distinction is important because honing and polishing perform different jobs. Honing removes or refines a small amount of the stone surface to correct damage and create an even foundation. Polishing works on that refined surface to increase clarity, depth and gloss. Trying to polish damaged marble without correcting the damage underneath can make the floor shinier while leaving scratches, etching and worn areas clearly visible.
For professional stone restorers, cleaners and contractors, the decision should therefore begin with the condition of the marble rather than a fixed rule that every floor must always be honed. A lightly dulled polished floor may only require cleaning and repolishing, whereas a scratched or etched surface usually needs some level of honing before the final polishing stage.
What is the difference between honing and polishing marble?
Honing and polishing are often discussed together because they are normally different stages of the same marble restoration process. However, they are not interchangeable. Honing is an abrasive process used to refine the marble surface, while polishing is primarily used to develop the final level of shine and reflectivity once the surface underneath is sufficiently even.
During honing, diamond abrasives or suitable honing products gradually remove a very fine layer of the stone. This makes it possible to reduce scratches, etching, traffic wear and other imperfections that sit within the upper surface of the marble. Depending on the final specification, honing can also be used intentionally to create a smooth matt or satin finish rather than a polished appearance.
Polishing comes later when a gloss finish is required. A suitable marble polishing powder, cream or polishing system is worked over the prepared surface to increase clarity, colour depth and reflection. The quality of the final polish therefore depends heavily on the condition of the surface beneath it.
This is why polishing cannot normally compensate for inadequate honing. If scratches from an earlier abrasive stage remain in the marble, the polishing process may make the areas between those scratches shinier, but the scratches themselves will still be present.
For a complete explanation of the two processes, see the AK Surface Solutions Stone Honing and Polishing Guide.
When can marble be polished without honing first?
Polishing without honing can be appropriate when the marble is fundamentally sound and already has a consistent polished surface, but the original gloss has reduced through normal use. The key point is that there should be little or no physical damage that needs to be removed before the gloss is restored.
A good example is a marble floor that was professionally polished in the past but has gradually become slightly dull because of foot traffic and routine cleaning. If the surface is still flat, free from significant scratches and not affected by obvious etching, a suitable polishing treatment may restore the appearance without requiring a complete diamond honing sequence.
The same can apply to some marble worktops, vanity tops and other lightly used surfaces where the stone has simply lost some of its original clarity. After thorough cleaning and assessment, a controlled polishing test can show whether the required result can be achieved directly.
A test area is particularly valuable in this situation. Rather than assuming the whole floor needs honing or assuming that polishing alone will work, the contractor can treat a small representative section and compare it with the surrounding marble. If the test area becomes clear and evenly polished without highlighting existing defects, a polishing-only process may be appropriate.
When does marble need honing before polishing?
Honing becomes necessary when the problem exists within the surface rather than simply in the level of gloss. Scratches are the clearest example. A polishing powder is not designed to remove significant scratches from marble, so attempting to polish over them will normally leave the damage visible.
Etch marks are another common reason for honing. Marble is primarily composed of calcium carbonate, which reacts with acids. Lemon juice, vinegar, wine, acidic bathroom cleaners and many household descaling products can chemically attack the surface and create dull or pale areas. These marks are not ordinary dirt sitting on top of the stone. The surface itself has been altered.
Light etching can sometimes respond to a specialist marble polishing process, particularly when the damage is extremely shallow. Once etching becomes deeper or creates a noticeable difference in texture, the affected area normally needs to be refined before the gloss can be restored successfully.
Heavy traffic wear presents a similar problem. On commercial marble floors, entrances, corridors and frequently walked areas may become noticeably duller than protected sections close to walls. If this difference is caused only by reduced gloss, repolishing may be sufficient. If the traffic lanes have become scratched or physically worn, honing is usually required to create an even surface before polishing.
How can you tell whether marble needs honing?
The first step is to inspect the floor when it is clean and dry. Dirt, detergent residue, old maintenance products and surface films can make polished marble look much worse than it actually is, so it is difficult to diagnose the underlying stone accurately before these materials have been removed.
Look at the surface from different angles and under good lighting. Straight scratches often become easier to see when light reflects across the stone, while etch marks typically appear as localised dull areas where the surrounding marble still has greater clarity. Traffic wear tends to be more widespread and often follows the routes people regularly walk across the floor.
Running a fingertip carefully across a damaged section can also provide useful information. A visually dull area that still feels completely smooth may require a different approach from a scratch that can be felt at the surface. The deeper the physical damage, the more material will generally need to be refined before the final polishing stage.
The existing finish must also be identified. Not every marble floor is intended to have a high gloss. Some marble installations are deliberately honed to create a matt or satin appearance, and applying polishing powder simply because the floor looks dull could change the intended finish.
A simple way to decide whether to hone or polish
The condition of the marble should determine the process.
| Marble condition | Likely approach |
|---|---|
| Clean, smooth marble with slightly reduced gloss | Test polishing first |
| Light dullness from normal traffic | Clean and test polishing |
| Very light isolated etching | Controlled polishing test may be suitable |
| Noticeable etch marks | Hone or refine before polishing |
| Fine scratches visible in reflected light | Refinement or honing usually required |
| Deep scratches | Start with an abrasive capable of removing the damage |
| Uneven traffic lanes | Hone sufficiently to create an even surface before polishing |
| Lippage or uneven tile levels | Mechanical grinding and progressive refinement may be required |
| Existing honed or matt finish | Do not polish unless a polished finish is actually required |
This type of condition-based assessment prevents unnecessary abrasive work while also avoiding the common mistake of trying to polish damage that should have been removed first.
Why polishing over scratches does not solve the problem
A polishing product works at a much finer level than the abrasives normally used to remove scratches. If a floor has visible scratches and the contractor moves directly to polishing, the surrounding surface may develop greater gloss while the scratch pattern remains underneath.
In some cases, this can actually make the damage more obvious. A highly reflective surface shows interruptions in the reflection clearly, so scratches that were less noticeable on a dull floor can stand out once the marble surrounding them becomes glossy.
This is why professional marble restoration normally works from the deepest defect upwards. The first abrasive stage needs to be aggressive enough to remove the damage that has to be corrected. Subsequent stages then refine the scratch pattern created by the previous abrasive until the stone is ready for polishing.
Starting too fine can waste considerable time because the abrasive may not be capable of removing the original damage. Starting unnecessarily coarse can also create additional work because every scratch produced by that first stage has to be removed during the later stages. The correct starting point should therefore be selected after inspecting and testing the marble.
What about marble etch marks?
Etching requires particular care because it is frequently mistaken for staining. A dark or discoloured mark may be a contaminant within the stone, while an etch mark is physical or chemical damage to the marble surface. The two problems require different treatments.
Acid-sensitive stones such as marble can react quickly with everyday acidic substances. In kitchens, citrus juice, wine and vinegar are common causes. In bathrooms, acidic limescale products can damage marble around basins, showers and taps. The result is often a pale or dull patch that remains after cleaning because there is no residue to remove.
Very light etching on previously polished marble may sometimes be corrected with an appropriate marble polishing powder. A small test should be completed first to determine whether the polishing process restores the affected section to the same level of clarity as the surrounding stone.
Deeper etching normally requires abrasive refinement. The damaged layer needs to be reduced until the surface is even again, after which the normal refining and polishing sequence can restore the required finish.
Can polishing powder remove marble scratches?
A marble polishing powder should not be treated as a substitute for a diamond honing process. Its main function is to create or restore the final polished appearance once the underlying marble has already been prepared to an appropriate standard.
Products such as A2 MIX are designed for the polishing stage on suitable calcareous materials including marble, limestone and travertine. When the marble has been correctly prepared, this type of treatment can help develop the sharpness, brightness and polished effect expected from professionally restored stone.
However, if visible scratches remain before the polishing product is introduced, those scratches may still be visible afterwards. The floor should therefore be inspected carefully before polishing begins rather than relying on the polishing product to correct defects left from earlier stages.
For larger restoration work, diamond abrasives may be needed to establish the surface first, followed by progressively finer refinement before the polishing stage.
How much honing does marble actually need?
Honing does not automatically mean starting with an aggressive diamond and completing every available grit. The amount of honing should correspond to the condition of the floor.
A lightly scratched surface may require only relatively fine refinement before polishing, while a heavily damaged floor may need to begin much earlier in the abrasive sequence. Marble affected by deep scratches, severe wear or lippage can require substantially more mechanical work before the surface is ready for a polishing product.
This is why starting with a test area is preferable to deciding the complete grit sequence in advance. Begin with an abrasive that appears suitable for the deepest damage, inspect whether it removes that damage effectively and then refine the surface progressively.
Each stage should remove the scratch pattern created by the previous one. If a stage is skipped before those scratches have been removed, the remaining marks often become apparent later when the floor begins to develop a higher level of reflection.
Can you polish just one dull area of a marble floor?
Local polishing is possible, but matching the surrounding finish can be difficult. Marble responds to polishing according to its mineral composition, existing finish, previous treatments and the amount of wear it has experienced. A newly polished patch can therefore look noticeably different from the rest of an older floor.
Small isolated etch marks or dull areas are often treated locally, particularly on worktops and vanity surfaces. The working area should normally extend beyond the exact boundary of the mark so that the transition into the existing finish can be blended rather than creating a clearly defined polished spot.
On large floors, the problem may be more obvious because light reflects across multiple tiles at the same time. If an entire traffic lane has become dull, polishing individual tiles can create inconsistent reflection. Treating a larger logical section may produce a more uniform result.
Again, a controlled test area is the safest way to establish how well the repaired section will match the surrounding marble.
Does marble need cleaning before honing or polishing?
Yes. Marble should be properly cleaned before the condition of the stone is assessed and certainly before abrasive restoration begins. Dirt and maintenance residue can clog pads, interfere with polishing compounds and make it difficult to judge the true condition of the surface.
Older polished floors can also accumulate layers of detergent residue, wax, crystallisation treatments or other maintenance products. What initially appears to be worn marble may partly be contamination sitting on the surface. Removing those materials can significantly change the diagnosis.
The cleaner itself must also be suitable for marble. Strong acidic cleaners should not be used simply because they are effective on other hard surfaces. Marble, limestone and travertine are acid sensitive, so unsuitable cleaning chemicals can create the very etching that the restoration process is intended to correct.
After cleaning, the surface should be rinsed where necessary and allowed to dry sufficiently before the restoration test is assessed.
Choosing abrasives for marble honing
The abrasive system needs to match both the material and the type of work being carried out. Large marble floors may be treated with professional floor machines and a progressive diamond system, while worktops, stairs, edges and smaller areas may require handheld equipment.
Flexible diamond pads are particularly useful where the tool needs to maintain contact across edges, profiles and smaller flat surfaces. AK Surface Solutions’ Marble Polishing Pads are designed for marble, limestone and travertine and are available for professional handheld polishing applications.
Whatever abrasive system is selected, consistency between stages is more important than simply working through grit numbers as quickly as possible. Each stage should be allowed to complete its job before moving to a finer abrasive.
The slurry and abrasive residue should also be removed thoroughly between stages. A coarse particle left on the marble while a finer abrasive is being used can create random scratches and undo much of the previous refinement work.
Common mistakes when polishing marble without honing
The most common mistake is assuming that every dull marble surface only needs more shine. Dullness is a symptom rather than a diagnosis. It can be caused by ordinary loss of polish, but it can also result from scratches, chemical etching, surface wear, cleaning residue or an unsuitable maintenance treatment.
Another mistake is beginning with polishing powder before the floor has been cleaned and inspected properly. If the surface contains old maintenance films or residue, the product may work inconsistently and the contractor may incorrectly conclude that the stone itself needs more aggressive restoration.
Trying to polish deep scratches is another source of wasted time. If the damage is deeper than the polishing stage can correct, continuing to polish will not eventually make it disappear. Moving back to the appropriate abrasive stage is normally the more efficient option.
Contractors should also avoid treating an entire floor based on the result from one unusual tile. Natural stone varies, and previous repairs or replacement tiles can respond differently. A representative test area covering several tiles often provides more useful information.
What should happen after marble has been polished?
Once the required finish has been achieved, polishing residue should be removed completely and the floor should be inspected when clean and dry. Look across the surface under reflected light to identify any remaining scratches, dull patches or transitions between restored sections.
The maintenance programme should then be considered. Routine cleaning with a suitable product helps preserve the finish, while abrasive dirt should be removed regularly because fine grit carried across the floor by foot traffic can gradually reduce gloss again.
Some marble installations may also benefit from a suitable impregnating or stain-protection treatment. A sealer does not normally prevent acid etching, so it is important not to present sealing as a way of making marble resistant to every household chemical. Its purpose is different and the product should be selected according to the stone, porosity, location and expected contamination.
If protection is required after restoration, make sure polishing residue has been removed and the stone is suitably dry before the treatment is applied.
Can homeowners polish marble themselves?
Minor maintenance and very light isolated dullness may sometimes be dealt with using an appropriate product, provided the material has been identified correctly and the instructions are followed carefully. However, marble restoration becomes considerably less forgiving once scratches, deep etching, lippage or large floor areas are involved.
Professional restoration equipment allows the surface to be refined systematically and gives much greater control over scratch patterns and the final finish. An incorrect abrasive or chemical treatment can enlarge a small damaged area and make the repair more difficult.
This is particularly relevant when dealing with expensive marble installations. Testing in an inconspicuous area and seeking technical advice before beginning an aggressive treatment can prevent unnecessary damage.
Professional contractors who want to develop their stone assessment, honing and polishing skills can also explore the practical surface restoration training available from AK Surface Solutions.
So, can you polish marble without honing it?
Yes, but the marble needs to be suitable for a polishing-only process. If the surface is smooth, free from meaningful scratches and mainly suffering from reduced gloss, cleaning followed by a controlled polishing test may be all that is required.
When scratches, deeper etching, uneven traffic wear or other physical damage are present, honing should normally come first. The objective is to remove or refine the damage and create an even surface before trying to develop the final gloss. Skipping that preparation may create a shinier floor, but it will not necessarily create a restored floor.
The most reliable professional approach is therefore to identify the marble, establish the existing finish, clean the surface, inspect the damage and complete a test before deciding on the full process. This prevents unnecessary honing on marble that only needs repolishing while ensuring genuinely damaged stone receives the surface refinement it needs.
AK Surface Solutions supplies professional diamond abrasives, honing and polishing products, machines and specialist surface-care treatments for stone restoration contractors throughout the UK. If you are unsure whether a particular marble floor needs honing or can be polished directly, contact AK Surface Solutions with photographs and details of the surface for technical product and process advice.