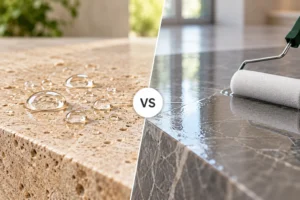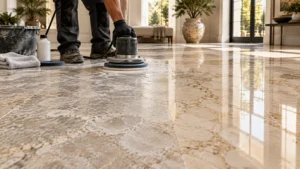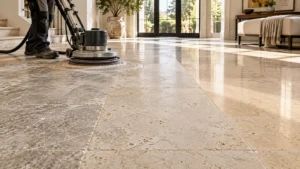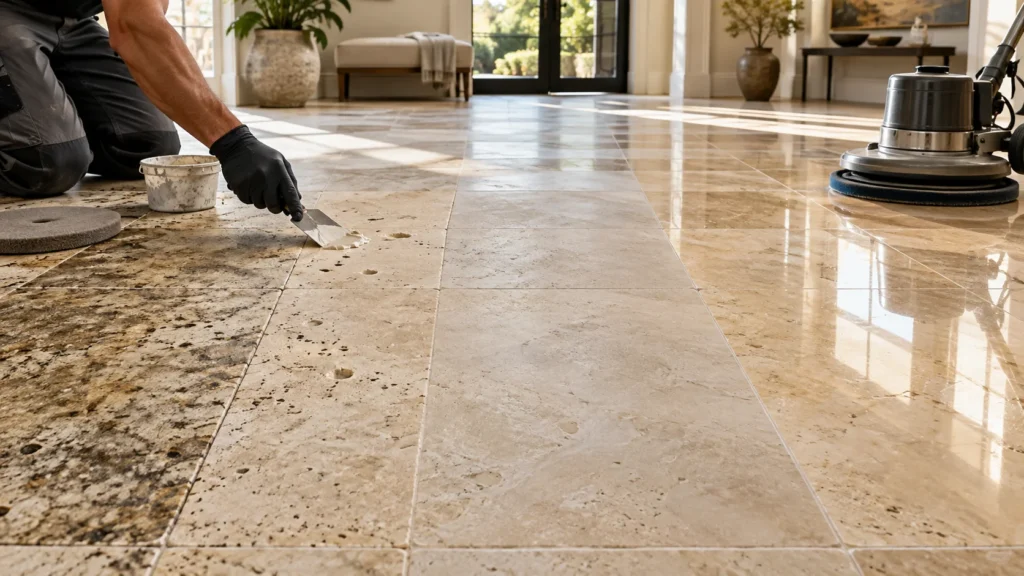
Travertine floors can remain attractive for decades, but they rarely age in exactly the same way as marble or other dense natural stones. The surface may gradually become dull, existing filler can break away from natural holes, scratches may appear in busy areas, cleaning residue can build up, and porous sections may begin absorbing spills more quickly. These changes do not necessarily mean the floor needs replacing. In many cases, a carefully planned travertine floor restoration can return the stone to a much cleaner, more consistent and easier-to-maintain condition.
The challenge is deciding which restoration stages are actually required. Some travertine floors only need professional cleaning and resealing. Others need damaged holes refilled, scratches honed away and the surface polished before protection is applied. A badly worn floor may need several of these stages, but carrying out every possible treatment regardless of condition can remove unnecessary material, increase labour and sometimes alter the character of the stone.
For UK stone restoration contractors, professional cleaners and property managers, the best approach is to assess the floor first and allow its condition to determine the process. This guide explains when travertine should be cleaned, filled, honed, polished or sealed, and how these stages fit together during professional restoration.
What makes travertine different from other natural stone floors?
Travertine is a form of limestone created by mineral deposition around springs and other calcium-rich water sources. One of its defining characteristics is the presence of natural voids and channels throughout the stone. Depending on how the material has been processed, these holes may be left open for a more rustic finish or filled during manufacturing to create a smoother surface.
This structure gives travertine much of its visual character, but it also affects how the floor wears. Filled sections can loosen or break away over time, particularly in busy areas, leaving small cavities that collect dirt. Open-pore travertine can trap contamination more easily and may require a different cleaning approach from a smooth polished surface.
Travertine is also calcium-based and therefore sensitive to acidic substances. Vinegar, acidic bathroom cleaners, descaling products and other low-pH chemicals can react with the surface and create dull etch marks. This means a cleaning method that works well on porcelain or some granites can permanently alter the finish of travertine.
The existing surface can also vary considerably. Travertine may be honed, polished, tumbled, brushed, filled, unfilled or given a more textured finish. Any restoration process should begin by identifying which finish is present and what result the client actually wants to achieve.
How do you know what a travertine floor needs?
A travertine restoration should begin with diagnosis rather than product selection. Clean a small representative section and inspect the floor under good lighting. Look for loose dirt, old coatings, scratches, dull traffic lanes, etching, missing filler, open holes, staining and differences between protected and heavily used areas.
If the cleaned test section becomes significantly brighter and more uniform, contamination may be responsible for much of the poor appearance. The floor may primarily need deep cleaning followed by suitable protection. If scratches, dull patches or inconsistent reflection remain after cleaning, the stone itself will need further restoration.
Check the holes and joints carefully as well. Existing factory filler or previous repair material may have cracked, sunk or fallen out. If this damage is ignored and the floor is honed directly, dirty slurry can collect in the cavities and the final surface may still appear unfinished.
The intended finish should also be agreed before work starts. A naturally honed travertine floor should not automatically be polished to high gloss simply because a polishing product is available. Restoration should return the stone to the required finish, not impose a different one without a reason.
When does travertine only need deep cleaning?
Professional cleaning may be enough when the stone is structurally sound, the existing finish remains relatively consistent and the main problem is ingrained contamination. Kitchen grease, soil, detergent residue and years of inappropriate maintenance products can all make travertine appear much duller than it really is.
The cleaner should be chosen according to both the stone and the type of contamination. Routine residue may respond to a suitable stone-safe cleaner, while heavier grease or old surface treatments can require a stronger alkaline cleaning process. The objective is to remove contamination without chemically attacking the calcium-based stone beneath it.
Mechanical agitation can be useful on heavily soiled floors, particularly where dirt has become trapped in pores and textured areas. However, pads and brushes must be selected carefully. An aggressive pad can scratch a polished travertine floor, while an unsuitable brush may be ineffective on heavily textured material.
After cleaning, extract the dirty solution thoroughly, rinse where required and allow the floor to dry before judging the result. Travertine can become darker and richer in colour while wet, so assessing the finish before it has dried may give an unrealistic impression of what the floor will look like afterwards.
Why acid cleaners should be avoided on travertine
Travertine is an acid-sensitive stone. Products containing acids can react with the calcium carbonate in the surface and create etching, which usually appears as a dull, pale or cloudy patch. Stronger exposure can also change the texture of the stone.
This is particularly important in bathrooms, where conventional limescale removers and descaling chemicals are often used around showers, basins and sanitary fittings. A product may remove mineral deposits successfully from ceramic surfaces while damaging the travertine immediately beside them.
The same issue applies to vinegar and other acidic household cleaning remedies. Although these products are frequently recommended for general cleaning, they are not appropriate for calcium-based natural stone. If a travertine floor has already been etched, applying another acidic substance will not restore the finish and may enlarge the damaged area.
When a dull area remains after proper cleaning, treat it as a potential restoration issue rather than simply increasing chemical strength. Honing or polishing may be required to correct the surface.
For broader professional cleaning guidance, see the AK Surface Solutions Stone Cleaning Guide.
When should holes in travertine be filled?
Natural cavities are part of travertine, but whether they should be filled depends on the original finish and intended appearance. Some installations deliberately use unfilled travertine because the visible holes contribute to a rustic aesthetic. In that situation, filling every opening would fundamentally change the character of the floor.
Filled and honed travertine is different. These tiles were originally supplied with the larger voids filled to create a smoother working surface. Over time, filler can break away under foot traffic or cleaning, leaving isolated holes that trap dirt and interrupt the finish.
Damaged filler should usually be repaired before the final honing and polishing stages so the repaired area can be levelled and blended with the surrounding stone. If filling is carried out only after the floor has been completely polished, the new repair may remain proud of the surface or have a noticeably different texture.
Loose and unstable material should be removed carefully before new filler is introduced. The cavity should also be free from dirt and contamination so the repair material can bond effectively.
For appropriate professional repair materials, contractors can review the GL 88 Stone Repair Mastic and other compatible stone restoration products.
Should travertine holes always be filled?
Not necessarily. The decision should respect the original finish and the client’s expectations. A rustic unfilled travertine floor may contain numerous natural cavities by design, while a smooth hotel lobby or polished residential floor may be expected to have a more continuous surface.
It is also worth distinguishing between natural open pores and new damage. An established open-pore finish can look completely appropriate, whereas a single fresh cavity in a previously filled tile may look like deterioration.
The use of the room matters as well. In kitchens and high-traffic commercial interiors, deep open holes can collect dirt and become difficult to maintain. Filling selected voids may therefore improve both appearance and cleanability even where the stone retains some natural texture.
A small repair test allows the colour, texture and finish of the filler to be assessed before larger areas are treated. On higher-value installations, this can prevent repairs that are technically sound but visually too obvious.
When does travertine need honing?
Honing is required when deterioration extends into the surface of the stone. Scratches, etch marks, uneven traffic wear and inconsistent previous polishing cannot normally be corrected through cleaning alone.
During honing, abrasives progressively refine the upper surface of the travertine. The starting point should be chosen according to the deepest defect that actually needs removing. A lightly worn floor may require only fine refinement, while deeper scratches and severe wear may need a more aggressive initial stage.
Starting too coarse removes more stone than necessary and creates a deeper scratch pattern that must then be refined through additional stages. Starting too fine can waste time because the abrasive may not be capable of removing the original damage. A test area is therefore one of the most useful steps in establishing the correct sequence.
After every honing stage, slurry should be removed and the floor inspected. Each subsequent stage must remove the scratch pattern left by the previous abrasive. If scratches are still visible and the contractor moves to polishing, those marks are likely to remain in the finished surface.
How to hone a travertine floor evenly
Consistency is especially important on travertine because the floor may contain different levels of porosity, existing filler and natural variation. Work in controlled sections and maintain an even machine pattern rather than concentrating repeatedly on isolated dull spots.
The main floor, edges, doorways and corners should all follow a compatible refinement sequence. Leaving the perimeter at a different stage can produce a visible border around the room once the centre develops a cleaner honed or polished finish.
Slurry management also matters. Travertine cavities can hold dirty abrasive slurry, particularly where filler has failed or the stone is intentionally unfilled. The floor needs to be extracted and rinsed thoroughly so contamination is not allowed to dry back into those openings.
Flexible diamond systems can be particularly useful where the surface has minor irregularities because they maintain more consistent contact with the stone. AK Surface Solutions’ ABRALUX Soft Floor Pads are one option within its professional stone polishing range for marble, limestone, travertine and terrazzo.
For a broader explanation of abrasive refinement, see the Professional Stone Honing and Polishing Guide.
Should travertine be polished after honing?
Only if the required finish is polished. Many travertine floors are intentionally honed because a matt or satin surface suits the material and interior better than a strong gloss. Once the correct honed appearance has been achieved, continuing into polishing would change rather than restore the finish.
Where a polished travertine surface is required, polishing follows after the honing stages have created a sufficiently smooth and consistent foundation. The polishing treatment then develops colour depth, clarity and reflection.
Polishing should never be relied upon to hide scratches from the previous stages. As the surface becomes more reflective, poorly refined scratches often become easier to see. If this happens, the correct solution is normally to return to the abrasive stage needed to remove the marks and then rebuild the finish.
Travertine also varies considerably in density and mineral structure. A polishing process that creates high gloss on one installation may produce a softer appearance on another. Testing the process on the actual floor is more reliable than assuming every travertine will polish identically.
How to polish travertine floors
Once the surface has been refined sufficiently, use a polishing product suitable for calcium-based natural stone. Work in manageable sections so the polishing slurry can be controlled and removed before it dries.
Machine speed, pad type, water quantity and working time all influence the result. Uneven polishing can create differences in reflection from one section to another, particularly under strong natural or artificial lighting.
The floor should be cleaned thoroughly after polishing and inspected when completely dry. Residual slurry can create a temporary haze, while water can make the stone look darker and more reflective than it will when dry.
Products within AK’s Honing and Polishing range can be selected according to the stone and finish. For suitable polished travertine, professional polishing powders can be incorporated into the final finishing stage after the correct preparation has been completed.
Can polishing powder remove scratches from travertine?
Polishing powder should not be treated as a substitute for proper honing. Its role is primarily to create or restore the final polished appearance on a surface that has already been prepared sufficiently.
Very minor surface dullness may improve significantly during polishing, but visible scratches usually require an abrasive capable of reaching their depth. Attempting to polish repeatedly over a scratch can increase the gloss around it without removing the defect itself.
This may make the scratch more noticeable because the surrounding travertine becomes increasingly reflective. The most efficient approach is to remove the deepest defect during the appropriate honing stage and then work progressively towards the final polish.
Products such as A2 MIX can be used as part of the polishing stage on compatible travertine, but the preparation underneath remains essential to the quality of the finished result.
What if the travertine has etch marks?
Etch marks occur when acidic substances react with the stone. They commonly appear as dull areas on polished travertine and are often mistaken for stains.
A stain usually involves discolouration caused by material entering the stone. An etch mark is a change to the surface itself. Cleaning can remove the original spill, but it cannot recreate material that has already been chemically altered.
Very light etching may sometimes respond to controlled surface refinement and polishing. Deeper etching needs to be honed until the affected layer has been sufficiently reduced, after which the surface can be refined back to the required finish.
If large areas have been damaged by an incorrect cleaner, restoring the entire affected section usually produces a more uniform result than attempting to spot-polish dozens of individual marks.
What if the travertine is scratched?
Fine scratches caused by day-to-day traffic may require only a relatively fine honing stage, particularly if the floor is already honed rather than highly polished. Deeper scratches caused by furniture, grit or equipment need a more aggressive starting abrasive.
Before attempting complete removal, consider how deep the damage is. Chasing one very deep scratch can require removing a considerable amount of surrounding stone. In some situations, reducing the visibility of the mark is more appropriate than grinding the complete area until the lowest point of the scratch disappears.
The contractor and client should therefore agree the expected result before work starts, particularly on older floors where the stone may already have experienced several previous restorations.
Once the appropriate starting point has been selected, each successive abrasive stage should refine the scratches produced by the previous one until the floor is ready for the chosen finish.
When should travertine be sealed?
Travertine is generally porous and can benefit from suitable protection against water and staining contaminants. Sealing normally takes place after cleaning, filling, honing and polishing have been completed because the stone needs to be clean and sufficiently dry before the treatment is introduced.
Applying sealer too early can create problems. Moisture, polishing residue or remaining contamination may interfere with penetration and lead to uneven absorption or surface residue.
The right treatment also depends on the density and finish of the travertine. A highly absorbent honed surface can behave differently from compact polished travertine, so sealer selection should be based on the actual stone rather than using one product universally.
Some clients want the stone to remain as natural in appearance as possible, while others prefer deeper colour. This should be established before selecting the final protection system because some treatments are intentionally designed to enhance the appearance of porous stone.
For a detailed overview, see the AK Surface Solutions Stone Protection Guide.
Does travertine need colour enhancement?
Colour enhancement is optional rather than an automatic part of restoration. Some travertine floors look significantly richer when their natural colours are deepened, particularly rustic and more absorbent material. Other clients prefer the lighter appearance of untreated stone.
An enhancer can also help create a more uniform appearance in some installations, but it should not be used as a shortcut for inadequate honing or cleaning. Scratches, residue and uneven preparation remain underneath the treatment.
Always test an enhancer on the actual travertine and allow the test to dry fully before deciding whether the appearance is suitable. Stone can darken considerably, and the final effect may be difficult to reverse once an entire floor has been treated.
For projects where a deeper appearance is specifically required, products such as WET LOOK ECO can be considered after compatibility and the required finish have been confirmed.
What order should travertine floor restoration follow?
There is no single sequence that every floor must follow, but a condition-based process usually looks like this:
| Floor condition | Likely restoration stage |
|---|---|
| Dirty but otherwise sound | Deep clean, dry and reassess |
| Old wax or maintenance residue | Strip or clean before evaluating the stone |
| Missing filler or broken repairs | Clean cavities and repair before final refinement |
| Light surface wear | Fine honing or refinement |
| Etching and visible scratches | Progressive honing |
| Honed finish required | Stop at the appropriate honing stage |
| Polished finish required | Refine sufficiently, then polish |
| Porous restored surface | Apply compatible protection after drying |
| Client wants deeper colour | Test a suitable enhancer before full application |
The important point is that stages should be included because the floor needs them, not simply because they are available.
Can old travertine floors be restored?
Many older travertine floors can be restored successfully if the tiles remain structurally sound. Surface wear, old coatings, scratches, damaged filler and loss of polish can often be treated without removing the floor.
The limitations usually relate to deeper structural issues. Loose tiles, movement, widespread cracking, moisture problems beneath the floor and severe substrate failure cannot be solved through honing and polishing alone.
Historic or heavily restored floors also require careful assessment because repeated grinding over many years may already have removed a meaningful amount of material. The objective should be to achieve the required improvement with the least aggressive process that is appropriate.
A representative test area gives both contractor and client a realistic idea of the achievable finish before work begins across the complete floor.
How to maintain travertine after restoration
Correct maintenance helps preserve the restored finish and reduces the frequency of major intervention. Dry abrasive soil should be removed regularly because grit carried indoors can create fine scratching under foot traffic.
Routine cleaning should use a suitable natural-stone cleaner rather than acidic household products. Excess detergent should also be avoided because repeated overdosing can create residue that attracts contamination and gradually dulls the appearance.
Entrance matting is useful in commercial buildings and busy homes because it captures much of the grit before it reaches the stone. The matting itself must be cleaned regularly so accumulated debris is not transferred back onto the floor.
Where an impregnating treatment has been used, monitor performance over time rather than applying new sealer automatically every year. Wear, cleaning practices, stone porosity and traffic levels all influence how long protection remains effective.
Common mistakes during travertine restoration
One common mistake is polishing immediately because the floor looks dull. If contamination, scratches or acid damage are responsible, polishing alone will not correct the underlying problem.
Another is filling every natural hole without checking whether the floor was intentionally installed as unfilled travertine. Restoration should respect the intended character of the material.
Using an aggressive acid cleaner is particularly risky. Travertine reacts with acid, so a product intended to remove stubborn mineral deposits can damage the stone itself and create additional honing work.
Skipping refinement stages can also leave obvious scratches once the surface is polished. Each stage must complete its job before moving to the next. The same applies to edges and corners, which should not be left noticeably different from the main floor.
Finally, sealer should never be applied simply because restoration has finished. The floor must first be clean, residue-free and sufficiently dry, and the treatment should be selected according to the stone and desired appearance.
Travertine floor restoration FAQs
Can badly worn travertine be restored?
Often, yes. Scratches, dullness, damaged filler, etching and general surface wear can frequently be improved through professional cleaning, repair, honing and polishing. Structural movement and severely damaged tiles may require additional repair or replacement.
Should holes in travertine be filled?
It depends on the intended finish. Factory-filled or smooth travertine usually benefits from repairing missing filler, while deliberately unfilled rustic travertine may retain its natural open cavities.
Can you polish travertine without honing it first?
If the existing surface is smooth and only has minor loss of gloss, a controlled polishing test may be sufficient. Scratched, etched or unevenly worn travertine normally needs refinement or honing first.
Can travertine be restored to a matt finish?
Yes. Honing can produce a controlled matt or satin finish without continuing into high-gloss polishing.
Should travertine be sealed after restoration?
Many travertine installations benefit from suitable impregnating protection because the stone can be absorbent. Sealer selection should depend on porosity, location, existing finish and the appearance required.
Does sealing stop travertine from etching?
An impregnating sealer is primarily intended to reduce absorption and staining. It should not automatically be expected to prevent acidic substances from reacting with the exposed calcium-based surface.
How often should travertine floors be restored?
There is no fixed schedule. The need for restoration depends on traffic, maintenance, finish, cleaning methods and the condition of the surface. Routine cleaning and appropriate protection can significantly extend the period between major restoration work.
Build the restoration process around the travertine
Successful travertine restoration is not about carrying out the maximum number of treatments. It is about identifying what has actually happened to the floor and selecting only the stages needed to correct it.
Begin with cleaning and assessment. Repair failed filler where the original finish requires a smooth surface. Hone scratches, etching and wear only as aggressively as necessary, then stop at a honed finish or continue to polishing according to the specification. Once the stone has been fully cleaned and dried, apply an appropriate protection system where required.
This approach preserves more of the original stone while producing a more consistent result. It also makes it easier to select the correct products because each treatment has a specific job rather than being expected to solve every problem at once.
AK Surface Solutions supplies professional stone repair materials, honing and polishing products, diamond abrasives and protection treatments for travertine restoration projects throughout the UK. Contractors dealing with unusual stone, failed filler, difficult polishing or uncertain sealer selection can contact AK Surface Solutions with details and photographs of the floor for technical product and process advice.